
Forensic Analysis of AWS Lightsail Instances
What is Lightsail?
Lightsail offers easy-to-use virtual private servers (VPS) with preconfigured applications or stacks (WordPress, LAMP etc.), as well as the firewalls, databases, storage and load balancers to support. This tightly coupled provisioning allows simplified, rapid deployment of simple web applications or websites. Lightsail prioritises simplicity over the flexibility provided by EC2, by abstracting away many of the controls. However, while the interface and pricing model is different, the underlying infrastructure supporting Lightsail is the same as more traditional AWS components.
Because of the focus on ease-of-use and rapid deployment, Lightsail can be a hotbed of poor practice, especially when application configuration (i.e. Wordpress) is accounted for. In addition, Lightsail billing is not shown under the EC2 dashboard, which can complicate auditing, and result in compromises going undetected for longer than might be expected.
Lightsail integrates a range of functionality into one service. For the purpose of this blog, we will be focussing on Storage, Containers, and Snapshots, as the most common targets for forensic analysis.
Key concepts
Lightsail offers a level of abstraction that is useful to the end-user, but can complicate analysis. It is particularly important to remember that to ‘snapshot’ has a different result depending if an Instance or Disk is targeted. If a Disk is attached to the Instance when it is imaged, the disk will also be included in the resulting snapshot. However, if it has been detached, it will have to be imaged separately.
| Lightsail component | Is equivalent to: | Lightsail ‘Snapshot’ results in: |
|---|---|---|
| Instance | EC2 (i.e. a server) | AMI |
| Disk | Attached EBS (i.e. a hard drive) | EBS |
| Bucket | S3 | Cannot snapshot buckets |
Analysis of a Lightsail Instance requires an AMI to be built, instantiated, and then the root disk to be detached for analysis. The creation of an AMI will remove any volatile memory, and therefore analysis will need to take another path if this is required. As SSM is not available for Lightsail, volatile memory acquisition will most likely have to be done ‘old school’ (i.e. via SSH, with the associated challenges).
Initial Review
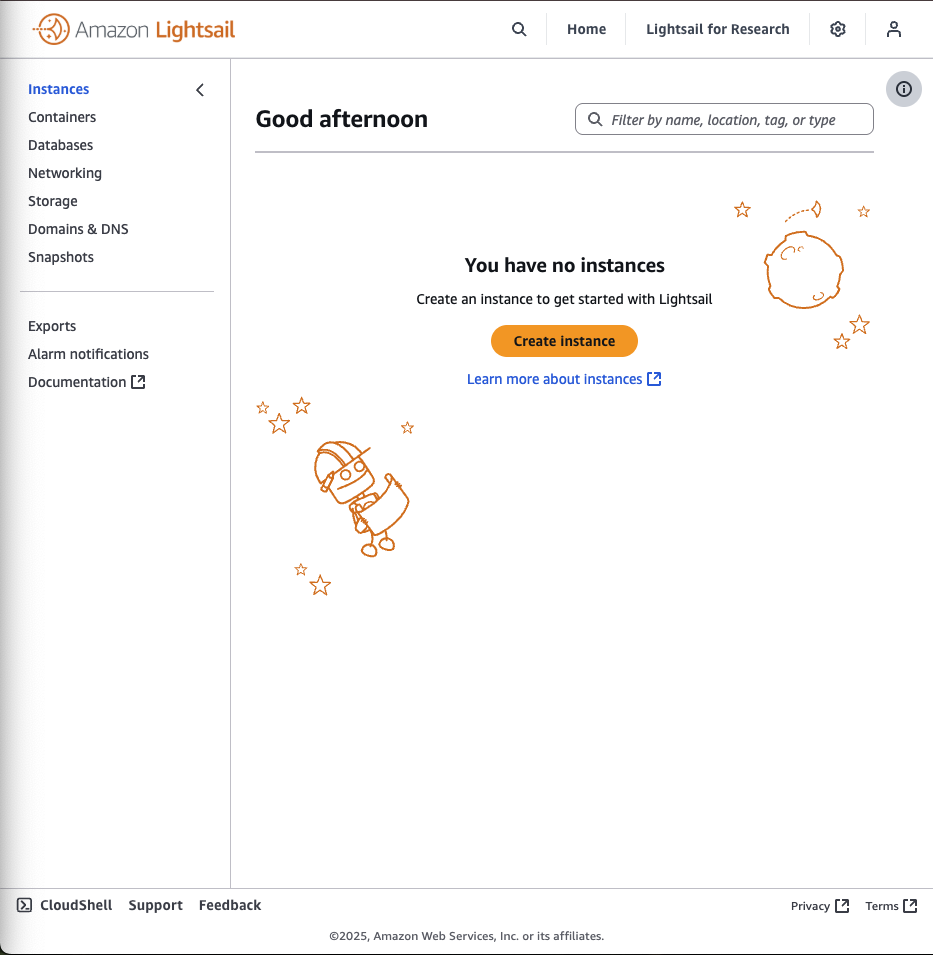
Lightsail instances can be found at https://lightsail.aws.amazon.com or through the GUI.
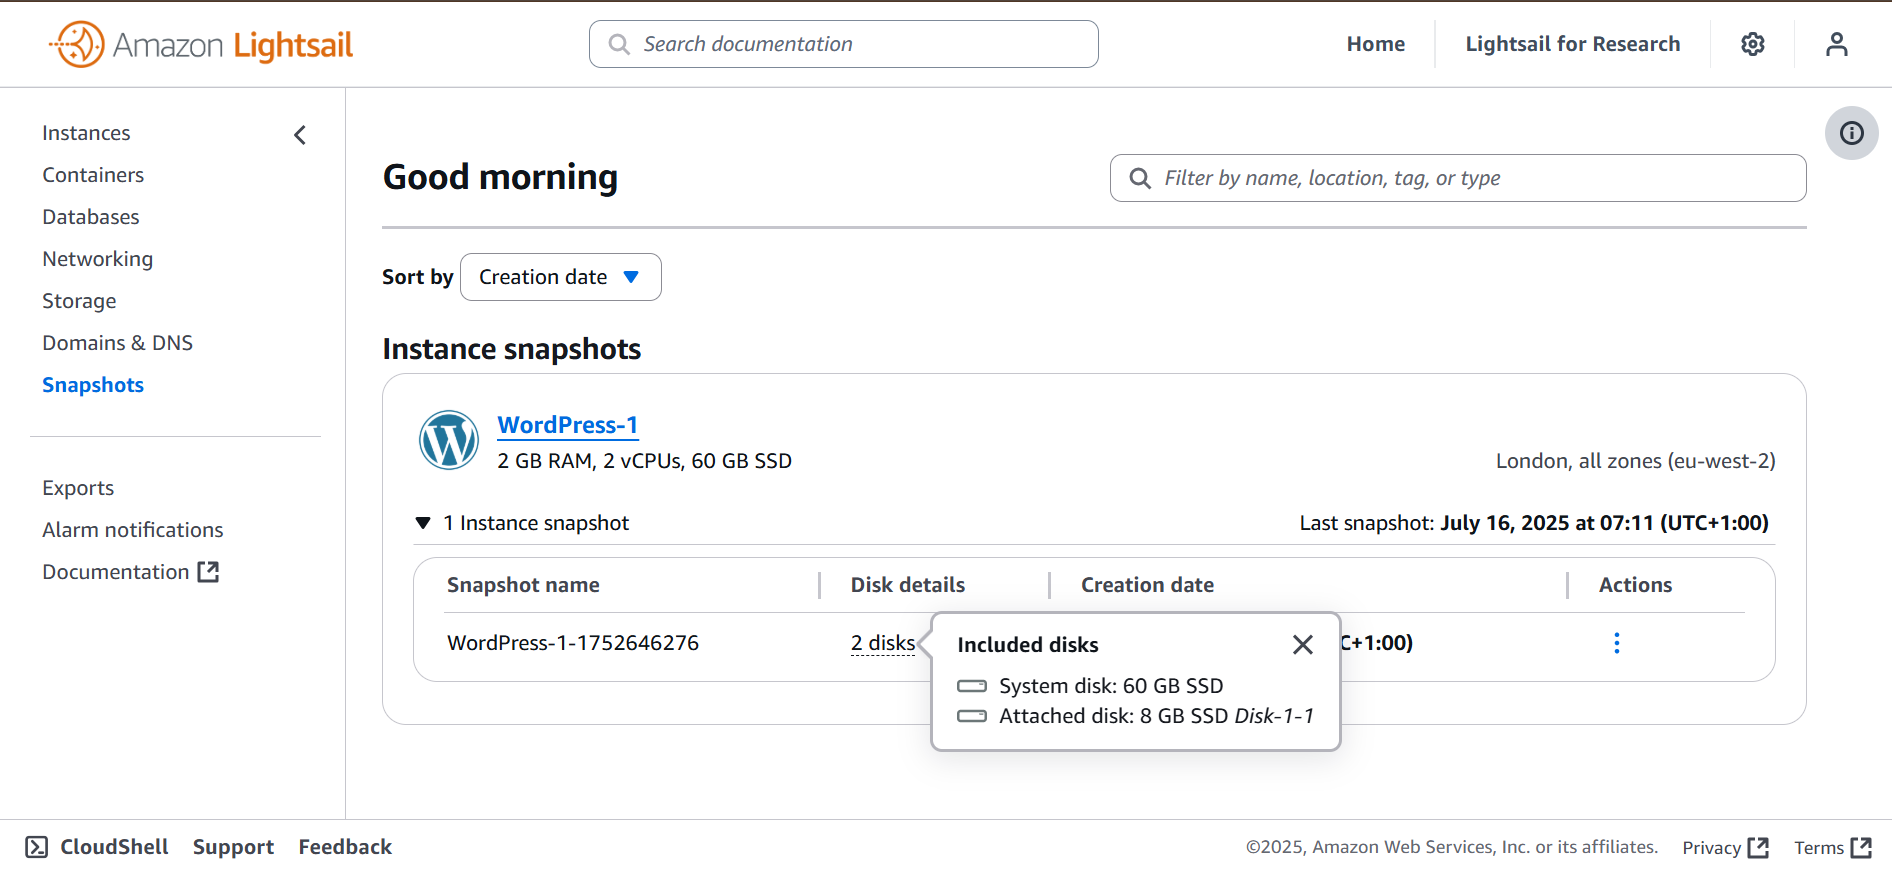
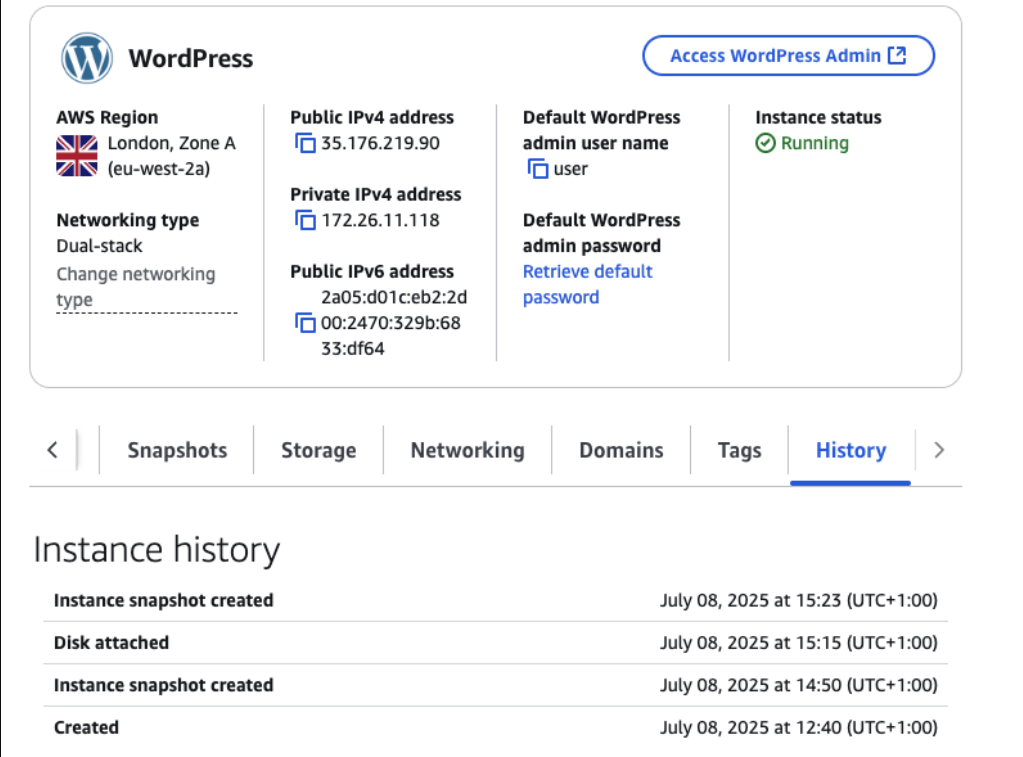
An overview of the instance history, including Disk interactions and snapshots can be viewed. Once an instance is deleted, so is the history, though events could be tracked in CloudTrail logs.
Prepare the ground
In the Lightsail console, identify:
- The instance of interest
- The instance state (i.e.
Running) and if there are any existing snapshots of interest - The Availability Zone of the Instance (i.e.
us-east-1a) - Any detached storage disks of interest – these will need to be acquired separately
At this point it’s useful to pull down the instance metadata. This can be done through the console, or via CLI, i.e. aws cli or CloudShell:
aws lightsail get-instance "INSTANCE_NAME" | tee get_instance.txt
aws lightsail get-disks | tee get-disks.txt
Best practice is to stop the instance temporarily to ensure a stable state. However, this may not be possible, due to interference with business operations or volatile memory acquisition.
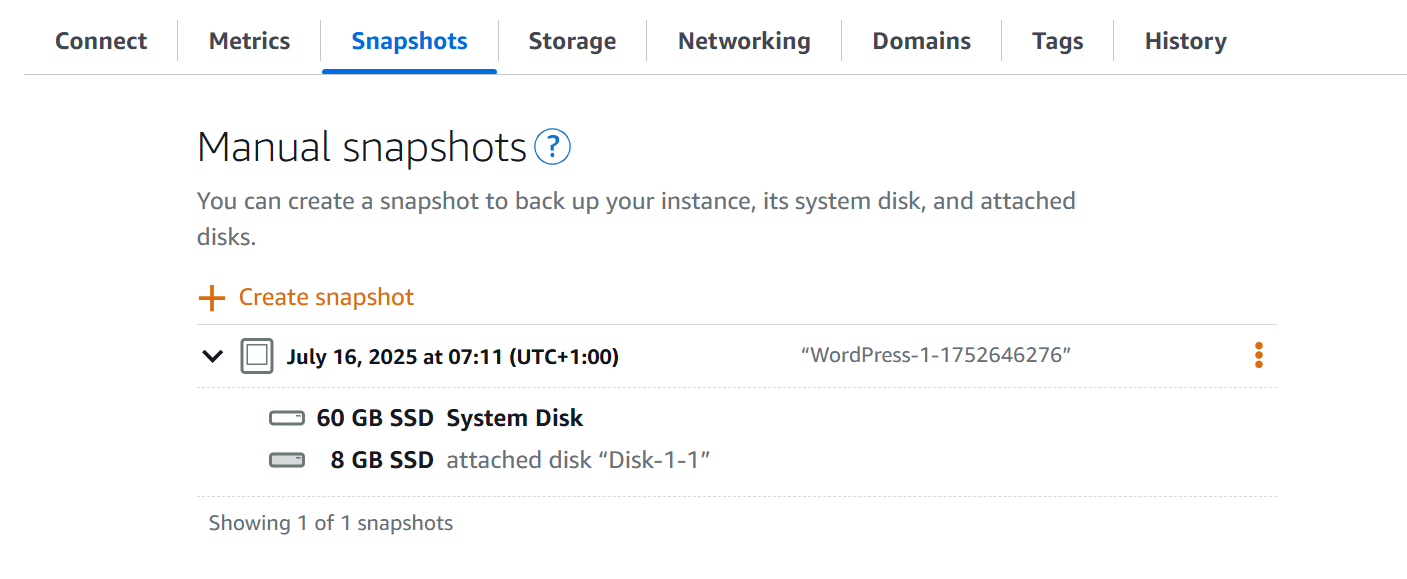
If disks are unattached but of interest - for example, the History panel has shown the disk was attached during the timeframe of interest - a separate snapshot can be taken.
# snapshot an instance "SUS_INSTANCE" and all attached disks
aws lightsail create-instance-snapshot \
  --instance-name "SUS_INSTANCE" \
  --instance-snapshot-name "INSTANCE_SNAPSHOT_NAME"

# snapshot detached disk "SUS_DISK" (if req)
aws lightsail create-disk-snapshot \
  --disk-name "SUS_DISK" \
  --disk-snapshot-name "DISK_SNAPSHOT_NAME"
Creating a snapshot can take ‘a few minutes to several hours’ depending on the size.
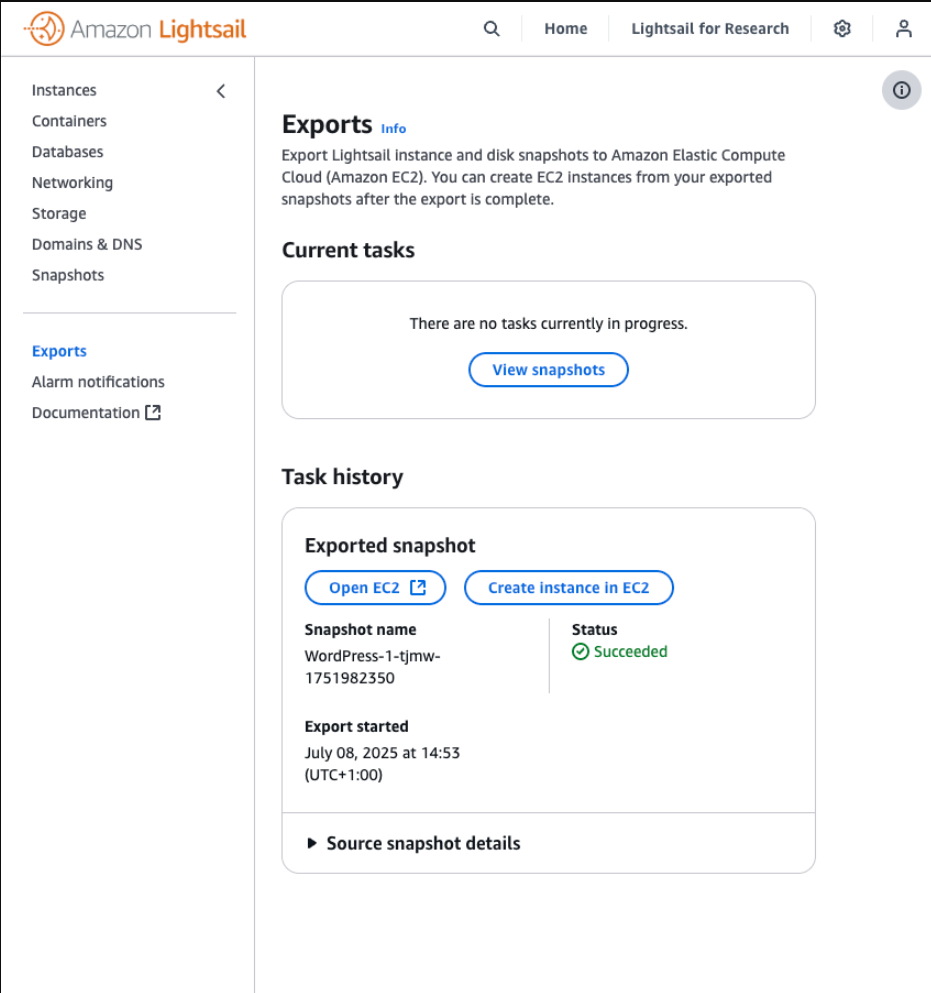
Export snapshots
Export can be done in the console:
- Select each Disk and Instance snapshot in the Lightsail console
Snapshotssubmenu - Select the kebab menu for each case, and
Export to Amazon EC2
This will convert Instance Snapshots into an AMI + EBS (one for each attached disk, including the Root disk), and Disk Snapshots into EBS (one Disk gives one EBS snapshot)
aws lightsail export-snapshot \
  --source-snapshot-name "INSTANCE_SNAPSHOT_NAME"
Once exported, the Instance snapshot will be available in EC2 > AMIs
Any snapshots of detached Disks will be available in EC2 > Elastic Block Store > Snapshots
Note: The Disks from the Instance snapshot will also be available under Elastic Block Store, however if you generate volumes directly from this, you may lose valuable context (i.e. instance configuration, disk permissions, root block mappings and boot parameters)
Move snapshots to forensic account
By default, the snapshot will be encrypted with an AWS-managed key, which cannot be shared across accounts. AMI generated by Lightsail are instance store-backed rather than EBS-backed. This means the encryption state cannot be changed in the copying process.
To move the snapshot across, we will need to:
- Create a customer-managed KMS key in the source account (hosting the lightsail instance), with a policy allowing the destination (forensic) account to use it
- Copy the AMI, encrypting it with this customer-managed key
- Share the AMI and grant KMS access to the destination (forensic) account
Make the key, create an alias for easy identification (i.e. “forensic-export-key”), and set the policy to allow the Forensic account to use the key. This is easiest done via the CLI, replacing values as required.
KMS_KEY_ID=$(aws kms create-key \
  --description "AMI export key for Forensic Analysis" \
  --key-usage ENCRYPT_DECRYPT \
  --key-spec SYMMETRIC_DEFAULT \
  --query "KeyMetadata.KeyId" \
  --output text)

aws kms create-alias \
  --alias-name alias/forensic-export-key \
  --target-key-id ${KMS_KEY_ID}
Set the KMS key policy to allow access from the Forensic Account
LIGHTSAIL_ACCOUNT_ID="xxxxxxxxxxxx"
FORENSIC_ACCOUNT_ID="yyyyyyyyyyyy"

aws kms put-key-policy \
  --key-id "${KMS_KEY_ID}" \
  --policy-name "default" \
  --policy "{
    \"Version\": \"2012-10-17\",
    \"Statement\": [
      {
        \"Sid\": \"AllowAccountAdminAccess\",
        \"Effect\": \"Allow\",
        \"Principal\": {
          \"AWS\": \"arn:aws:iam::${LIGHTSAIL_ACCOUNT_ID}:root\"
        },
        \"Action\": \"kms:*\",
        \"Resource\": \"*\"
      },
      {
        \"Sid\": \"AllowForensicAccess\",
        \"Effect\": \"Allow\",
        \"Principal\": {
          \"AWS\": \"arn:aws:iam::${FORENSIC_ACCOUNT_ID}:root\"
        },
        \"Action\": [
          \"kms:Decrypt\",
          \"kms:DescribeKey\",
          \"kms:CreateGrant\",
          \"kms:GenerateDataKeyWithoutPlainText\",
          \"kms:ReEncrypt*\"
        ],
        \"Resource\": \"*\"
      }
    ]
  }"
Copy the AMI using the new key you have just generated. This can be done in the console (Actions > Copy AMI) or CLI. Make sure to set the Destination Region is correct.
AMI_ID="ami-xxxxxxxxxxxx"
SOURCE_REGION="XX-XXXX-X"

aws ec2 copy-image \
  --source-image-id $AMI_ID \
  --source-region $SOURCE_REGION \
  --name "forensic-copy-${AMI_ID}-$(date +%Y%m%d)" \
  --encrypted \
  --kms-key-id alias/forensic-export-key
Share across the AMI and Snapshots to the account of interest.
Now that we have made the changes to the KMS, the EBS snapshot associated with the AMI can be decrypted. We can now share the AMI and Snapshot across to the Forensic account. Select the AMI:
Edit AMI Permissions > Share with Account (Account ID)
Select the Snapshot:
Snapshot settings > Modify account > Add Forensic Account ID
Or else in the CLI:
AMI_ID="ami-xxxxxxxxxxxx"
SNAP_ID="snap-xxxxxxxxxxxxxxxxx"
FORENSIC_ACCOUNT_ID="xxxxxxxxxxxx"

aws ec2 modify-image-attribute \
  --image-id $SNAP_ID \
  --launch-permission "Add=[{$FORENSIC_ACCOUNT_ID$}]"

aws ec2 modify-snapshot-attribute \
  --snapshot-id snap-xxxxxxxxxxxxxxxxx \
  --attribute createVolumePermission \
  --operation-type add \
  --user-ids $FORENSIC_ACCOUNT_ID
The AMI will be visible in your Forensic account under the ‘Private Images’ subset of AMIs.
Prepare for analysis
Reconstruction of the AMI
- Launch an EC2 instance from the AMI, remembering that this must be:
- Within an isolated subnet (i.e. no internet access, public IP or other access)
- With termination protection enabled
- Tagged as required (i.e. with Case ID)
- In the same Availability Zone as your forensic instance, to allow it to be mounted
- As soon as the Lightsail instance environment is faithfully rebuilt, shut it down cleanly
- Detach the newly created EBS filesystem(s) of the Root drive and any other attached drives
# launch instance
INSTANCE_ID=$(aws ec2 run-instances \
  --image-id "AMI_ID" \
  --instance-type t2.medium \
  --placement AvailabilityZone="$SIFT_AZ" \
  --query 'Instances[0].InstanceId' \
  --output text)

# stop the launched instance
aws ec2 stop-instances --instance-ids "$INSTANCE_ID"
aws ec2 wait instance-stopped --instance-ids "$INSTANCE_ID"
echo "$INSTANCE_ID stopped and ready to extract EBS filesystems for analysis"

# identify the attached volumes
VOL_IDS=$(aws ec2 describe-volumes \
  --filters Name=attachment.instance-id,Values="$INSTANCE_ID" \
  --query "Volumes[?Attachments[0].State=='attached'].VolumeId" \
  --output text)
Attach and Mount the volumes to the forensic EC2 host
Start up a forensic host, such as a SIFT instance, remembering to confirm the Availability Zone is the same as the EBS to be analysed. Whilst the EBS volumes could be downloaded for analysis, running analysis in the cloud is generally faster and more cost efficient.
SIFT_INSTANCE_ID="i-xxxxxxxxxxxx"
idx=0
DEVICE_LETTERS=(f g h i j k l m n o p)

for VOL_ID in $VOL_IDS; do
  aws ec2 detach-volume --volume-id "$VOL_ID"

  echo "[*] Waiting for $VOL_ID to become available..."
  aws ec2 wait volume-available --volume-ids "$VOL_ID"

  DEVICE="/dev/sd${DEVICE_LETTERS[$idx]}"
  echo "[*] Attaching $VOL_ID to SIFT ($SIFT_INSTANCE) as $DEVICE..."
  aws ec2 attach-volume \
    --volume-id "$VOL_ID" \
    --instance-id "$SIFT_INSTANCE" \
    --device "$DEVICE"
  idx=$((idx + 1))
done
Finally, it’s time to enter the forensics host and mount the volumes. The method will depend on the host and the file type, for example from an Ubuntu host mounting ect4:
lsblk # identify disk, confirm size is correct
sudo mkdir /mnt/forensic-root
sudo mount -o ro,noload /dev/xvdf1 /mnt/forensic-root
# if additional disks present
sudo mkdir /mnt/forensic-disk1
sudo mount -o ro,noload /dev/xvdg1 /mnt/forensic-disk1
If using FTK Imager, the volume can be accessed directly without mounting.
Wrap-up
We’ve described what Lightsail is, why it may be of interest during an incident response, and how to export files from an AWS Lightsail instance into a form more familiar to basic forensic analysis.
To aid this, we have described the steps and some basic CLI commands to achieve this more easily. Unfortunately CloudShell has a nasty habit of dropping variables - next time we might review how to use boto3 to offer a more error-resistant approach.
Required permissions on the target Lightsail instance
"lightsail:GetInstance",
"lightsail:GetInstanceSnapshot",
"lightsail:CreateInstanceSnapshot",
"lightsail:CreateDiskSnapshot",
"lightsail:GetDisk",
"lightsail:GetDiskSnapshot",
"lightsail:ExportSnapshot",
"lightsail:GetExportSnapshotRecords",
"lightsail:GetInstances",
"lightsail:GetDisks"